Showing posts with label tutorial. Show all posts

Wednesday, 19 November 2014

Wooden Ornaments DIY


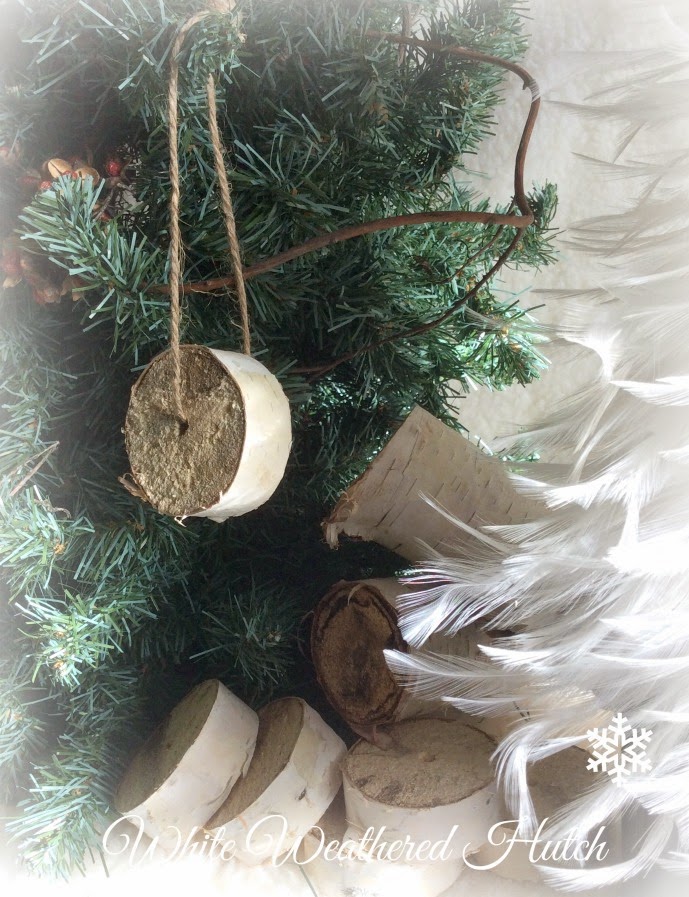
                                                                        How fun are these......

                                                         Just an old birch log cut into discs ......

                                                              Drill a hole .....add some twine for a hanger.....

                                                                   Keeping with Nature Inspired I kept mine
                                                                                      plain....


                                                                   You could go glitter........
                                                                             add some
                                                                           Elmer's glue and then some
                                                                                   sparkles (glitter)

                                                                                     or

                                                                    add some glue and some faux snow.....
                                                                                 
                                                                                You choose....


                                                                      Love to decorate with
                                                                            Birch Logs......

                                                              Thanks for stopping by!


       how to make a tree go here
       how to make bleached pine cones here           

Tuesday, 18 November 2014

Tomato Cage Tree


                                     This is a fun project just in time for the Holiday Season..


                                          Having many tomato cages in the shed and
                                             leftover...don't know how I'm going to use
                                                 it..... FAUX GARLAND

                                                         I decided to make a tree...
                                                             not just any old tree
                                                               but this tree is going
                                                                  to be  NATURE INSPIRED !


                                                  So let's get started shall we.....

                   Supplies you will need:
                    . tomato cage
                    . faux garland
                    . florist wire


                                                         Wrap the top with the florist wire
                                                                         as shown...


                                                     Now you are ready to assemble this cute tree..


                                                                 Start at the top and wrap garland
                                                                       around and around the
                                                                           tomato cage till
                                                                        you reach the bottom.

                                                                  Now use some of the florist
                                                                     wire to hold the branches
                                                                         to the tomato cage.....


                                                               Time to get creative...

                                                        time to shape it
                                                                 pull out and fluff up                                                 
                                                                       and make it look like branches


                                                              It's beginning to look like a tree....

                                                    I had some bittersweet leftover from
                                                            my fall urn and used it to wind
                                                                 around my tree......


                                                            Grape vine would also look
                                                                     very rustic....


                                                                Thanks for stopping by!


                                            go here for tutorial on bleaching pine cones            


                                                            Like me on Facebook


Thursday, 5 July 2012

Herb Drying Rack / Tutorial

Herb Drying Rack....
There are so many on the market.
They range in price from $30.00 and up.

Well I decided to make my own. Mine cost $0.00


Let's make one together.
You will need some scrap wood.   
    (    I found my in the shed. I used it to stake up plants.
     It measures 1 1/2 in by ????  )

a staple gun
hammer/nails
a saw ( I used a scroll saw)
netting/fencing small gauge
measuring tape
cutters to cut fencing.
sand paper


Lets get started.

cut 5 pieces of wood 1 1/2 " x 18"
cut 2 pieces of wood 1 1/2 by 15"
sand your ends
cut fencing/netting   19" x 17"


Now you are ready to hammer.

Make your frame..
take 2 , 18" lengths and 2, 15" lengths and
make your frame

Then lay out your fencing on the top and


staple all around the edge. Then trim any excess.
Now position your 3. 18" lengths equally across
this frame on top of the fencing.
Hammer away.


 Mine finished at 18" x 16"

Now you are ready to dry your herbs.
I'm drying Lavender.

As you can see my plants are ready to harvest.

You can dry other herbs as well. My oregano,basil, rosemary and thyme, will soon
need drying.
Hope you enjoyed this tutorial and try making your own.
I would love to see your finished drying racks.

                                          Have a great weekend!
                                              Linda

I'm linking with these parties
Funky Junk Interiors 
Met Monday 
Stone Gable Tutorial 

Sunday, 25 March 2012

Cutting Board/chalkboard tutorial

Here is a cute cutting board/chalk board that you can make in an afternoon.


Supplies needed.
1 - 1" pine board cut into a cutting board (make own pattern)
scroll saw
stain,
chalkboard  paint,
jute twine

I cute mine 6" x 12"

Next I stained the board front and back. Let it dry about 2hours.
Then I taped off an area that I wanted to use as a chalkboard.
Painted the area and let dry 1 hour.
Cut a piece of twine to wrap around arm of cutting board.


Now you are ready to add whatever saying you wish.
It's that easy.
Won't you give it a try.

                                   Have a great day!
                                      Linda

Linking up with
Katherines Corner

Thursday, 22 March 2012

Topiary and a tutorial

I know,,,, I know ....... there have been so many tutorials on Topiary.
                        But I just wanted to make my own.
I love them all, store bought, fresh. Wuslu had one on their special today. $29.90


Well I just made mine for $3.25.  Sorry Wuslu I try to save whenever I can.

I picked a topiary ball at the dollar store for $2.00

Ivy was $1.25.

A small fallen branch 0.

Black urn (MINE) a clay pot, ceramic dish, what ever works for you.

Moss(ALREADY HAD)

$ STORE CLAY (already had)
 If you have oasis (green floral foam) works well.

Let's now join the pieces.
First put the clay in the urn.

Then comes the branch.

Next I pushed the topiary ball on the branch.( NO GLUE NEEDED)

Then came the moss.

Then I unraveled the ivy and started at the top and wove it around the branch and
then wove it on the moss.  Let a little hang over the edge.

There you have it. An elegant piece to display. On a counter,
an island, a table.,,,,,,,,,,,,,
Now try one for yourself.

                                          H ave a great day!
                            
                                             Linda

                               I'm linking up with Katherines Corner